...
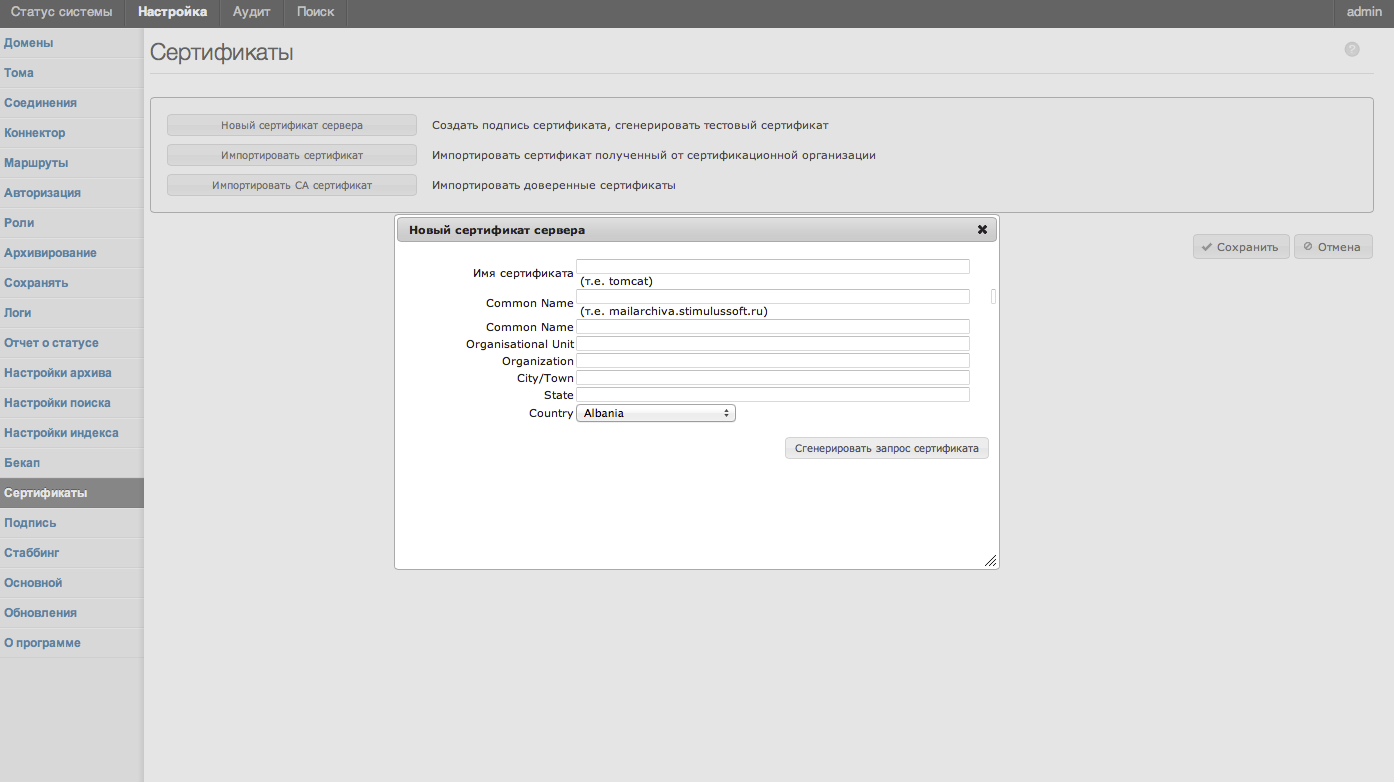
- Нажмите "Новый сертификат сервера" в "Сертификаты"
- Введите storage alias. Этот псевдоним это произвольное имя (выбранное Вами) потом его вы будете использовать для ссылки на сертификат.
Info если устанавливаете HTTPS, используйте "tomcat" как alias
Введите common name сертификата
Info если устанавливаете HTTPS, common name должен быть FQDN сервера (т.к. mailarchiva.stimulussoft.ru)
Заполните оставшиеся поля
Info Избегайте ввода сокращенных наименований для города и государства, так как многие компании CA не будет принимать запрос на подпись.
- Нажмите кнопку «Сгенерировать запрос сертификата»
- Выделите и скопируйте запрос на подпись сертификата в буфер обмена. Закройте диалоговое окно.
- Вы должны увидеть псевдоним для подписания сертификата в списке сертификатов сервера на вкладке Сертификаты.
- Enter the common name of the certificate.
- Complete all the relevant demographic information
- Click the “Generate New Cert Request” to generate the Certificate Signing Request
- Select and copy the certificate signing request to the clipboard. Close the New Server Cert dialog.

- You should see a place holder for your signing certificate listed in the Server Certificates list in the Certificates tab.
...
- Obtain a free 15 day trial SSL certificate / purchase a certificate from a CA such as Verisign.
- Paste in the Certificate Signing Request (CSR) generated earlier.

- In most cases, the server certificate and CA certificates will be mailed to you
- Create a folder on your Desktop called Certificates
- Open a text editor and paste the contents of the server certificate. Name the file as "server.cert" and save into the Certificates folder.
- Similarly, copy the intermediate CA certificate to a text file called intermediate.cert.
- Finally, copy the CA root certificate to a text file called root.cert.

Step 3. Import the Certificates
- Click “Import CA Cert”, select the root.cert file, enter “root” as the storage alias and click Import

- Click “Import CA Cert”, select the intermediate.cert file, enter “intermediatecert” as the storage storage and click Import

- Click “Import Server Cert”, select the user.cert file. Select the same alias as used in the CSR generation step above (e.g. tomcat).

- If all went well, the server certificate and CA certificates should be visible in the Certificates list.
...
Key Store
The private key and certificate is stored in a standard Java keystore file. This file is called mailarchivacerts and is located in the Configuration directory.
For additional certificate management functions, such as key and certificate export, please refer to the keystore utility included with the Java Runtime.
To obtain the password to the keystore, run the commandline utility getkeystoresecret. This utility is located in server folder under the main application folder.

Enter your Архива encryption password. The resultant passphrase is the password to your mailarchivacerts keystore. If the certificates are being using
for TLS, this passphase can be entered in the Tomcat server.xml HTTPS connector.
Получение сертификатов от центра сертификации (CA)
- Получите бесплатную 15 дневную пробную версию SSL сертификат / приобретите сертификат от центра сертификации, таких как VeriSign.
- Вставьте в запрос на подпись сертификата (CSR), созданный ранее.
- В большинстве случаев, сертификат сервера и сертификат CA будет отправлен вам по почте.
- Создайте папку на рабочем столе с именем Сертификаты
- Откройте текстовый редактор и вставьте содержимое сертификата сервера. Назовите файл как "server.cert" и сохраните в папку Сертификаты.
- Аналогично, скопируйте промежуточный сертификат в текстовый файл с именем intermediate.cert.
- Наконец, скопируйте сертификат корневого центра сертификации в текстовый файл с именем root.cert.